How makerito picks filament colors: palette and override
Four filaments in your AMS, and a logo with twelve shades: which colors end up in the 3MF, and which spool prints what? Here is how makerito builds your palette, and how to take control of it with the override.
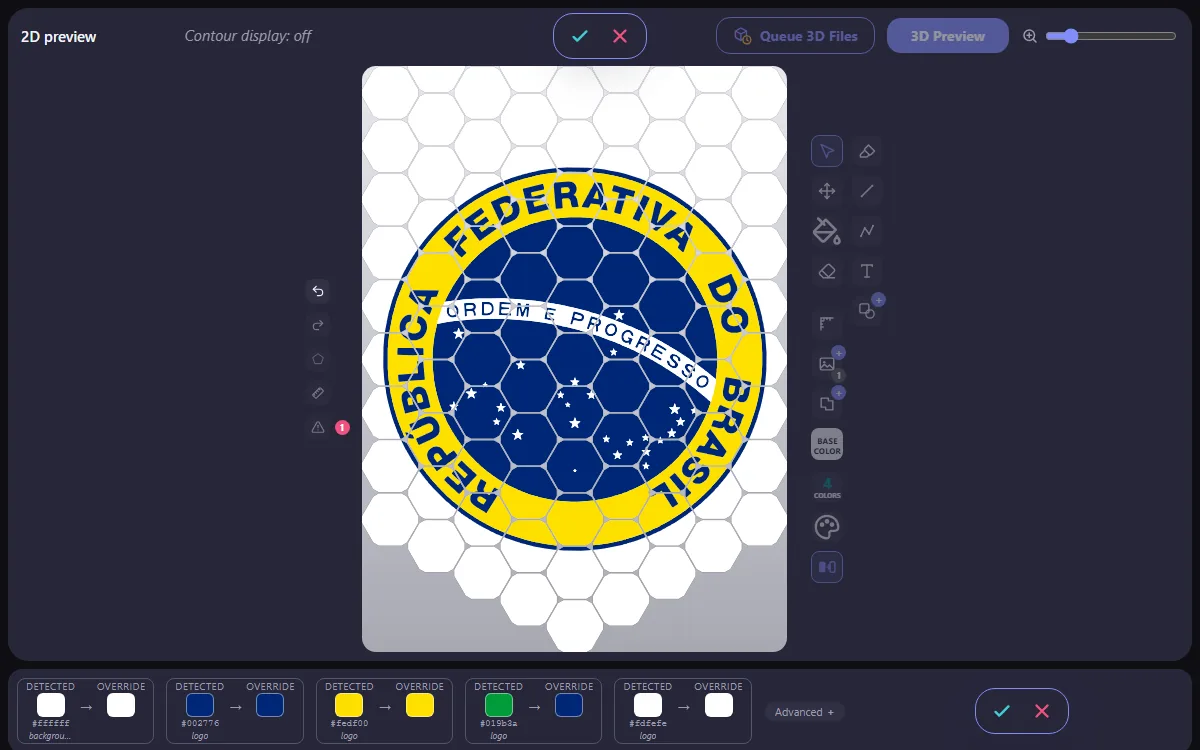
Two steps: detect, then select
1. Detect. makerito reads the colors of the whole design: logo, base color, shapes, texts and drawings. The closest shades are merged until 10 colors remain (10 by default, up to 20). These are the Detected colors.
2. Select. makerito keeps the most important colors, up to Nb Max colors: 4 by default, one per AMS slot. These are the Selected Colors, and only they are printed: one multicolor 3MF, and one STL per color. Set it to the number of filaments you can load.
A real color of the drawing wins over a neutral outline or artifact, even a large one. When two selected colors are only two shades of the same color, such as a gold and a bright yellow on a football crest, makerito keeps one of them and gives the freed slot to the color that is worst represented, such as the white of the stripes.
The Auto-merge near colors box of the palette, ticked by default, merges two colors that are nearly identical, such as two blacks a few values apart. Untick it, and makerito shows them with a Merge button instead.
Where each detected color goes
Every detected color goes to the closest selected color. On loading, a shape never lands on the base color while another choice exists, so nothing vanishes on the background. A white band on a white base, made white on purpose, stays white.
When you change the palette, or click Auto-match colors, two more rules apply: the hue first, so a bright blue goes to your turquoise rather than to white; and a grey stays grey, rather than going to a vivid color.
A new shape or text keeps its default color while a slot is free. When the palette is full, it takes one of the selected colors, never the base color, so nothing you add disappears when you click OK.
The override: choose yourself
Open the Override tool. Each detected color is shown with an arrow towards the color it will print in: Detected → Override. Click the Override square, pick another selected color, then confirm with ✓.
- Sport. Your crest has three blues and the club colors are navy and gold. Send the blues to navy and the yellows to gold.
- Geek. A pixel-art sprite with eight colors and four spools: choose which details share a filament.
- Makers. Edit the selected colors to match your actual spools, so the preview looks like the print.
To edit a color, open Edit the colors, click it, and pick a swatch or type its hex code. Click a + slot to add one, the small × to remove one.
Your manual choices are kept
Once you paint an object with the paint bucket, or pick its color in the Override tool, makerito stops moving it when the palette changes. If you edit the palette color you used, the object follows: your blue background turns green when that blue becomes green.
Under Advanced, in the Override tool, two buttons recompute the colors. Auto-match colors sends each untouched color to the nearest selected color and keeps your manual edits; clicking it twice changes nothing the second time. Re-match all colors puts every color back as it was when loaded, painted zones and objects included. Only transparency and your drawings stay.
How does it work? 1-minute video · Try it on a pennant →
Multicolor 3D printing, Bambu Lab AMS and more: all use cases
makerito is an independent tool, not affiliated with Bambu Lab.